


Thursday, May 17, 2012
PTU- Bettie

This tutorial was made using PSPX2, but can be adapted
To do this tutorial you must have working knowledge of Paint Shop Pro
For this tut, you will need 3 tubes
This tutorial was written by DesignsbyRená on February 15th 2012
Any resemblance is purely coincidental. Enjoy!
I am using the wonderful work of Keith Garvey, which can now be found here!
Items you need:
Vix_HalloweenTemplate02 which can be found here! (Thx Vix!)
Scrapkit Obsidian by Dark Yarrow, which is no longer for purchase, but you can find the freebie here (Thanks Yarrow)
Xero : Fritillary
Eye Candy 4000 – Gradient Glow
Fonts: BankGothic Lt BT & A&S motherlode
Remember to save often!!!!
Now on to the fun part!!!!
Change canvas size to 800 x 800 (you can crop later)
Check to make sure the image information is 72.000 DPI
Delete the “terms” layer, the “background” layer, the “wordart” layer, “skulls” layer, and lastly the “Stars” Layer. You should now have 3 layers left.
Now time to pick a tube!!!
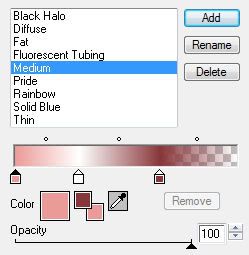
For my tag, I used # 88363a for the foreground & #eb9b97 for the background
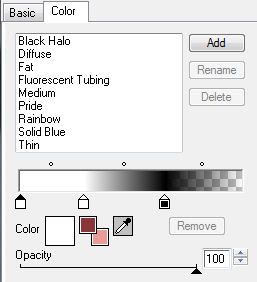
Now set the foreground to the gradient below:
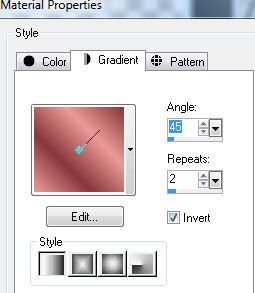
Make sure you are on the “Rectangle” Layer
Now grab your magic wand set to:
Add (shift) RGB Value, 0 Tolerance, Continguous, Feather: 0, with Anti-alias checked, outside
Now select the middle (orange) square
Flood Fill with your gradient
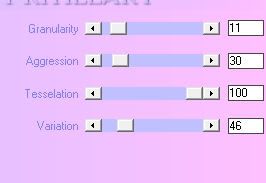
Apply Xero : Fritillary with the settings below
Deselect
Use your magic wand (with the same settings) and select the two black rectangles
Apply Fritillary with the same settings
Deselect
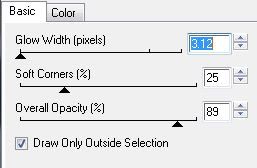
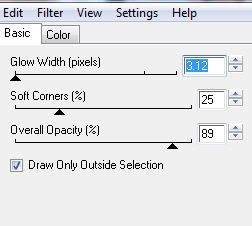
Apply Gradient Glow with the following settings:
Now select your “Orange Dotted Rect” layer
Control “A” (which will select this entire layer)
Press and Hold Control, then F (this will float the selection)
Zoom in to 500%
Floodfill (5 times) with your foreground color (#88363a)
Deselect
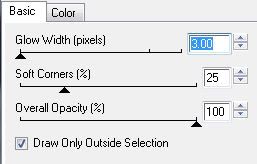
Apply Gradient Glow:
Now to DECORATE!!!
Open up “Beaded Heart” from your scrapkit
Image>Resize>50% (make sure resize all layers is NOT checked)
Adjust>sharpness>sharpen
Place to the left of your columns (look at my tag for an example)
Duplicate layer
Image>mirror
Layer merge down (merging both hearts layers)
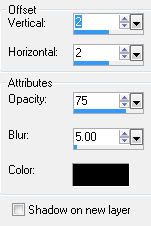
Apply a drop shadow:
Add the tube of choice (I used Bettie Remembered
Then add the same drop shadow
I had to resize my tube by 80% to make it fit
Adjust>sharpness>sharpen
Position the tube the way you like
Return your color palette to :
Foreground: #88363a and Background : #eb9b97
Now using the bankgothic (or a font of choice)
Write a phrase ( I used Beauty) multiple times
Apply, positioning at the top (look at my tag)
Duplicate this layer
Image>flip then image>mirror
Adjust>sharpness>sharpen
Position to your liking, making sure that the tube is your top layer.
Merge both wordart layers (beauty)
Then add the following gradient glow:
Switch your color palette
Now type a different saying or phrase (Bettie, is what I used 3x)
Apply same gradient glow
Image>free rotate>90 degrees to the left
Position
Layer duplicate>mirror>flip
Merge both Bettie saying layers
Adjust>sharpness>sharpen
Now merge all text (word art) layers
Then apply same drop shadow as before
From your scrapkit chose a frame
I chose frame01
Copy>paste as a new layer
Resize by 50%
Adjust>sharpness>sharpen
Layer>duplicate>mirror
Position (look at my tag for reference)
Merge down (both frame layers)
Layers>arrange>send to bottom
Layers>view>current only
Now pick 2 close ups from the same artist
Using your magic wand, click inside the left frame
Selections>modify>expand>by 5
Add a new layer
Flood fill with the gradient we used before
Post close up 1
Position
Selections>invert>delete the excess
Merge both gradient & closeup layer, and move below frame layer
Deselect
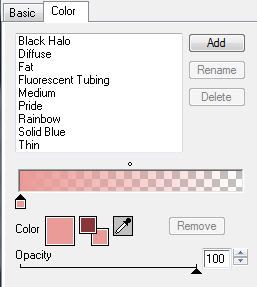
Repeat this step for the second frame (but invert the gradient)
Then merge the frame layer, closeups and gradient layers
Position
Now on your frame layer>duplicate>flip
Merge both frame layers
Adjust>sharpness>sharpen
Layers>view all
Open Doodle01 from your scrapkit
Copy>paste as a new layer
Move to the right side, then duplicate>mirror
Merge down (both doodles)
Layers>arrange>send to bottom
add a drop shadow to the doodles
Then crop to edges
Save!!!!!!
I saved mine as a png image, as to avoid a background :o)
REMEMBER TO ADD ALL PROPER COPYRIGHT information!!!!
Add your name!
Hope you have enjoyed my tutorial!
I would luv to see your results, please send them to designsbyrena@windstream.net with “Tut Results” as the subject
THANK YOU!!!!!!
Subscribe to:
Post Comments (Atom)
About Me
- Designs by Rená
- SAHM to two wonderful children. Married for 14 years to my best friend. I have been using PSP for 15+ years now,and love all aspects of it. If you need to get ahold of me,please email me at designsbyrena01@windstream.net


0 comments:
Post a Comment