Powered by Blogger.
Thursday, May 31, 2012
PTU - Gothic Love
This tutorial was made using PSPX2, but can be adapted
To do this tutorial you must have working knowledge of Paint Shop Pro
This tutorial was written by DesignsbyRená on March 31th 2012
Any resemblance is purely coincidental. Enjoy!
Font is Baumfuss & BankGothic Lt BT
I am using the wonderful work of Rebellious Scraps for the “Emo Girl”, this is a script for PSP, which can now be found here!
For the actual scrapkit, I am using Sweet Skulls by AmyMarie
Which can be found at here!
Last but not least you need your template 445, by Missy which can be found here!
For this tut, you will need to have the following plugins
Eye Candy 4000
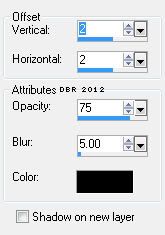
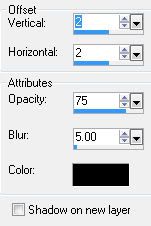
Now remember you have the open to add a drop shadow to which ever layer you wish. I used the drop shadow below
Now 4 the tut!!!!
Open Missy’s template (445)
Resize the canvas to 800x800(crop later)
Delete the credits layer
Now I want you to open element Sparkles1
Copy>paste as a new layer
Duplicate>image>mirror>flip
Merge both sparkles layers
Now place this layer at the very bottom of your template
This is so it is behind your tag, and lights it up a bit
Now select layer rounded edge rect3
Float>defloat
Open paper 26
Copy>paste as a new layer
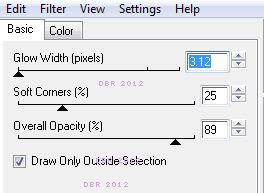
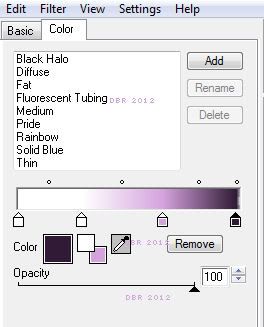
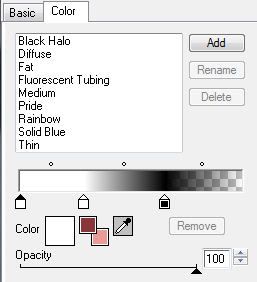
Add the following gradient glow
Invert>delete the excess
Now select layer circle3
Float/defloat
Open paper 15
Copy>paste as a new layer
Invert>delete the excess
Add the same gradient glow
Now select layer square2
Float/defloat
Open paper 24
Invert>delete the excess
Add gradient glow as before
Now do the same for square1
Now select layer rounded edge rect2
Open paper 19
Copy>paste as a new layer
Invert>delete the excess
Now select small rectangle2
Open Element heartspiked
Image>resize>50%
Adjust>sharpen>sharpen
Place in the black box (small rectangle2)
Some will hang over on the bottom, don’t worry about it :o)
Duplicate>mirror>flip
Now select layer small rectangle
Place the second spikedheart in the black box as before
Now select layer roudned edge rect1
Open paper 26
Copy>paste as a new layer
Invert>delete the excess
Now select layer centre circle
Open paper 5
Paste as a new layer
Invert>delete the excess
Select layer circle 2
Open paper 25
Copy & paste as a new layer
Invert>delete the excess
Next, select layer
Open paper 25 again
Paste as a new layer
Invert>delete the excess
Select heart 1 layer
Open paper 24
Paste as a new layer
Invert>delete the excess
Delete the sweet on you layer
Select layer rectangle
Open element corset
Copy and paste as a new layer twice inside the black square
Invert>delete the excess on both corset layers
Using whatever tool you wish, make the corset layers look cool!!!
Now I used the font BankGothic Lt BT (pay font) to write gothic love
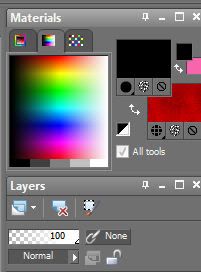
Using black as the foreground and #d4a2dd as the background
Delete the heart2 layer
Add your tube of choice
Move your wordart “gothic love” above your tube if you wish, I did this because I didn’t want anyone stealing my tube.
Add your name using the Baumfuss font using the same colors
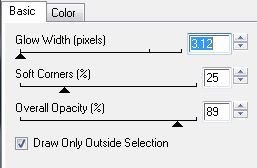
This time we will be using this gradient glow
Also, add the same dropshadow
Last but not least, open the element Kitty
Image>resize>75%
Adjust>sharpen>sharpen
Place to the right of your tube (if you wish)
Crop your tag
DON’T FORGET TO ADD PROPER © INFORMATION!!!!!
Anywayz, I hope you have enjoyed this tutorial.
If you have any questions, suggestions, or want to show off your results, please email me at
designsbyrena@windstream.net
Labels:
PTU,
Rebellious Scraps
|
0
comments
Monday, May 28, 2012
PTU - Rocker
ADVANCED TUTORIAL
This tutorial was made using PSPX2, but can be adapted
To do this tutorial you must have working knowledge of Paint Shop Pro
This tutorial was written by DesignsbyRená on May 28th 2012
Any resemblance is purely coincidental. Enjoy!
I am using the wonderful work of IsmaelRac
Items you need:
Template by Rosey 74 which can be found here!
Scrapkit “Hard Rock” by AmyMarie, which you can purchase here!
Word Art by Rosey
Plugins Needed
Eye Candy 4000
Xero>Fritillary
Font is Motrhead (PTU,sorry)
Image>canvas size> 800x800 (we can crop layer)
Delete the credits layer & white background layer
Also delete Copy of Raster 8 & Raster 8
Now we are ready to start tagging!
LITTLE NOTE: You have the option to add a drop shadow (below) to each lever
Select Raster 13
Float/defloat
Paste paper 7 as a new layer
Copy>paste as a new layer
Selections invert>delete the excess
Do the same with the Copy of Raster 13 layer
Click on Raster 9
Float/defloat
Open paper 1
Copy>paste as a new layer
Invert/delete the excess
Do the same for “Copy of Raster 9”
Select layer 12
Float/defloat
Flood Fill with black
Add the following gradient glow:
Select Raster (layer) 6
Float/defloat
Open paper 12
Copy/paste as a new layer
Invert>delete the excess
Add same gradient glow
Now select Raster 2
Open paper 10
Copy and paste as a new layer
Invert>delete the excess
Add the same gradient glow
Select layer 11
Float/defloat
Floodfill with black
Add gradient glow
Repeat with Copy of Raster 11
Select Raster 16
Float/defloat
Open Paper 7
Invert>delete the excess
Add gradient glow
Repeat with layer Copy of Raster 16
Select raster 3
Open Paper 12
Copy/paste as a new layer
Invert/delete the excess
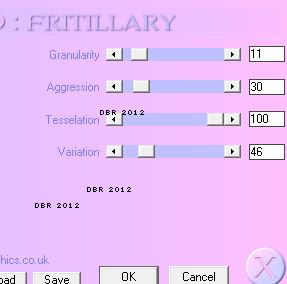
Now using Xero>Fritillary
Use the following settings:
Add a new layer
Copy and paste your wordart (I used “Rockerwordarttemplate5”)
Position to your desire
To have the effect I did, place one on the left>mirror>flip
Now add your tube!
For my font, I used Motrhead
With the setting set with black as foreground, and paper 12 as the background
Don’t forget to crop your tag
DON’T FORGET TO ADD PROPER © INFORMATION!!!!!
Anywayz, I hope you have enjoyed this tutorial.
If you have any questions, suggestions, or want to show off your results, please email me at
Labels:
Ismael Rac,
PTU
|
0
comments
Sunday, May 27, 2012
PTU - Gothic Cutie
This tutorial was made using PSPX2, but can be adapted
To do this tutorial you must have working knowledge of Paint Shop Pro
For this tut, 1 or 3 tube(s)
This tutorial was written by DesignsbyRená on May 27th 2012
Any resemblance is purely coincidental. Enjoy!
I am using the wonderful work of Ismael Rac, which I purchased it from www.xeracx.net
Items you need:
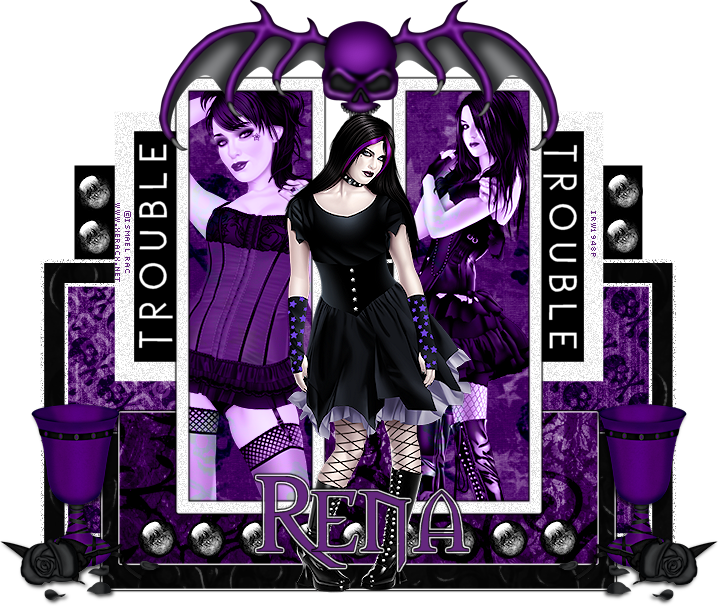
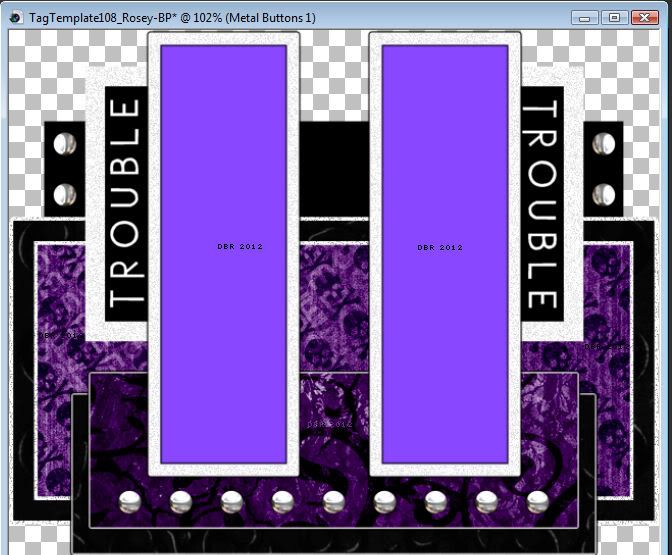
Template by Rosey 108 which can be found here!
AmyMarie's kits at ByWendyG Store here
Plugins Needed
Eye Candy 4000
Font is Morpheus
Open up the template by Rosey (108)
Image> Canvas size > 800x800 (we can crop later)
Delete the following layers
Credits, Background
Select Rectangle Fill (Blue)
Float/defloat
Open Amy Marie’s paper # 024
Copy>paste as a new layer
Invert selection>delete the excess
Select Frame layer
Float/defloat
Open paper # 4
Copy and paste as a new layer
Invert>delete the excess
Select the Bottom Rectangle layer
Float>defloat
Open paper # 018
Paste as a new layer
Invert>delete the excess
Add the following gradient glow
Then add the following drop shadow
Select the Bottom Pink Rectangle layer
Float>defloat
Open paper #5
Copy & paste as a new layer
Invert>delete the excess
Add the same gradient glow from above
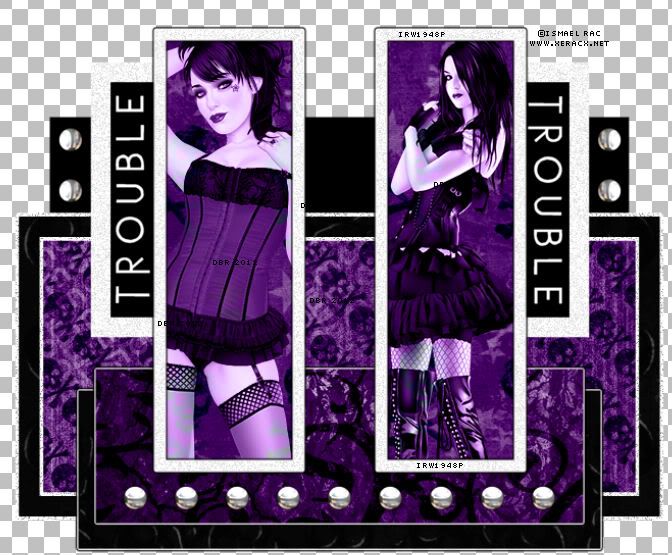
This is what your tag should look like now
Select the Frame Fill layer
Open paper # 024
Paste as a new layer
Invert>delete the excess
Invert your select again
Using your Selection tool, select the left rectangle
Float>defloat
Add tube of choice
Set to luminance (l)
Do the same or the right rectangle
This is what you should have now
Now a tricky part
Select layer Metal Buttons 2
Open element 1el
Resize by 35%
Adjust>sharpen
Now duplicate and cover each button (metal buttons 2 & metal buttons 1) with this element
Once you have covered each button with this element
Open the wingedskull3 element
Copy and paste above your tag (look at the main tag for an example of placement)
Now open element Chalice1
Resize by 50%
Adjusts>sharpen
Place one on the left
Duplicate, mirror
Now place your main tube
I had to make mine a bit smaller to compliment the tag, if you have to do this, don’t forget to adjust>sharpen
Look at my tag for an example of placement
Add your name!
I used black & #64277e for my name
Don’t forget to crop your tag
DON’T FORGET TO ADD PROPER © INFORMATION!!!!!
Anywayz, I hope you have enjoyed this tutorial.
If you have any questions, suggestions, or want to show off your results, please email me at
Labels:
Ismael Rac,
PTU
|
0
comments
Saturday, May 26, 2012
Additional Page Added
Just wanted to let everyone know that I have added a new page,where you can see my tutorials done as FTU by an incredible tagger,Lisa aka Abrat2u. If you submit your results (ptu or ftu) they will also be included on this page!
Hope yall have a great day!
Huggles,
Friday, May 25, 2012
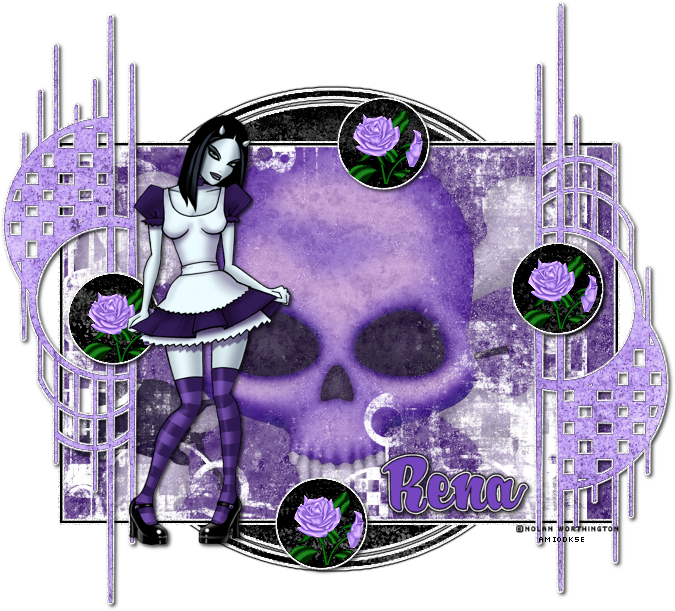
PTU - Purple Emo
This tutorial was made using PSPX2, but can be adapted
To do this tutorial you must have working knowledge of Paint Shop Pro
This tutorial was written by DesignsbyRená on May 25th 2012
Any resemblance is purely coincidental. Enjoy!
I am using the wonderful work of Nolan Worthington, I purchased it from AMI, but you are welcome to substitute another tube!
Items you need:
Template by Sue 4 which can be found here!
Scrapkit Emoultion Addiction by AmyMarie, which you can purchase here!
Plugins needed
Eye Candy 4000 – Gradient Glow
Font: A&S Rister
Remember to save often!!!!
Open up the template by Sue (4)
Image> Canvas size > 800x800 (we can crop later)
Select the outline layer (the very bottom layer)
Adjust>add noise>50%
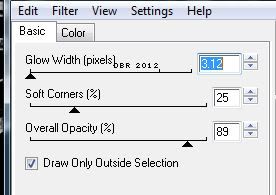
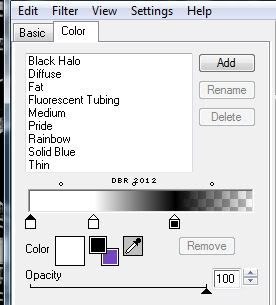
Select the mask layer and add the following gradient glow:
Now select the black layer
Float/defloat
Open paper 24 from Amy Marie’s kit
Copy>paste as a new layer
Invert select>delete the excess
Deselect
Add the same gradient glow as before
Now add the following drop shadow
Open element AmyMarieVSR2
Insert as a new layer above your purple square layer
Drop the opacity of this layer to 57
Go to the frame layer
Adjust>add noise> 50%
Drop shadow same as above
Now on the right w layer
Adjust>add noise>50%
On the right layer,
Float/defloat
open up paper 13
Copy and paste as a new layer
Invert selection>delete the excess
Do the above steps again with the left w and left layers
Now a little tricky part
Select each white circle layers
Adjust>add noise> 50%
Now select (one at a time) each black circle layers
Copy and paste paper 24 into each black circle layers
Now on one of your black circle layers
Open element AmyMarieRose2
Resize by 25%
Adjust>sharpen
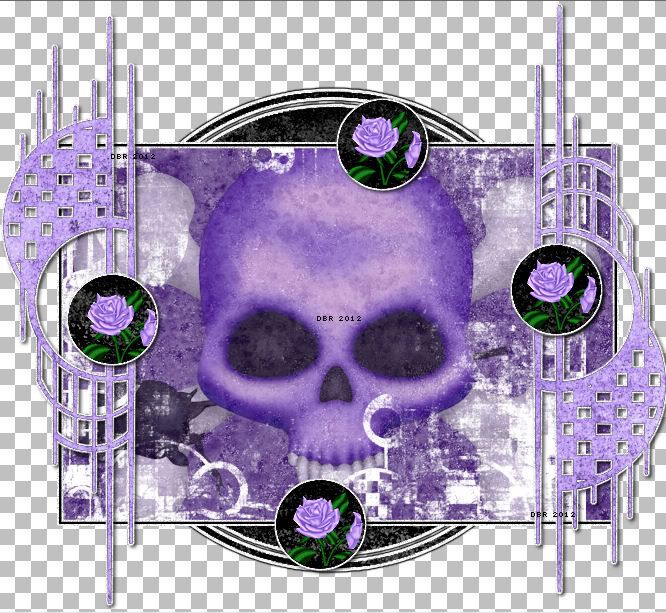
Place a rose in each little black circle, until it looks like this
Keep in mind that the above image has been cropped
Now add your tube
Add ur name, I used black & #7546c0 and then added the same gradient glow as above
Don’t forget to crop your image!
BE SURE TO ADD THE PROPER © INFORMATION!!!!!!
Anywayz, I hope you have enjoyed this tutorial.
If you have any questions, suggestions, or want to show off your results, please email me at
Labels:
Nolan Worthington,
PTU
|
0
comments
Subscribe to:
Comments (Atom)
About Me

- Designs by Rená
- SAHM to two wonderful children. Married for 14 years to my best friend. I have been using PSP for 15+ years now,and love all aspects of it. If you need to get ahold of me,please email me at designsbyrena01@windstream.net
Blog Archive
Labels
- PTU (25)
- Ismael Rac (9)
- VeryMany (9)
- Rebellious Scraps (3)
- FTU (2)
- Anna Marine (1)
- Bettie Page (1)
- Carlos Diez (1)
- Keith Garvey (1)
- Nolan Worthington (1)
- Scott Blair (1)


